SkyWalking简介
目前主要的一些APM工具有: Cat、Zipkin、Pinpoint、SkyWalking,这里主要介绍SkyWalking ,它是一款优秀的国产APM工具,包括了分布式追踪、性能指标分析、应用和服务依赖分析等。
Skywalking是由国内开源爱好者吴晟(原OneAPM工程师,目前在华为)开源并提交到Apache孵化器的产品,它同时吸收了Zipkin/Pinpoint/CAT的设计思路,支持非侵入式埋点。是一款基于分布式跟踪的应用程序性能监控系统。另外社区还发展出了一个叫OpenTracing的组织,旨在推进调用链监控的一些规范和标准工作。
文章源自小柒网-https://www.yangxingzhen.cn/7987.html
说明:SkyWalking的核心是数据分析和度量结果的存储平台,通过 HTTP 或 gRPC 方式向 SkyWalking Collecter 提交分析和度量数据,SkyWalking Collecter 对数据进行分析和聚合,存储到 Elasticsearch、H2、MySQL、TiDB 等其一即可,最后我们可以通过 SkyWalking UI 的可视化界面对最终的结果进行查看。Skywalking支持从多个来源和多种格式收集数据:多种语言的 Skywalking Agent 、Zipkin v1/v2 、Istio 勘测、Envoy度量等数据格式。
文章源自小柒网-https://www.yangxingzhen.cn/7987.html
整体架构看似模块有点多,但在实际上还是比较清晰的,主要就是通过收集各种格式的数据进行存储,然后展示。所以搭建 Skywalking 服务我们需要关注的是 SkyWalking Collecter、SkyWalking UI 和 存储设备,SkyWalking Collecter、SkyWalking UI 官方下载安装包内已包含,最终我们只需考虑存储设备即可。
文章源自小柒网-https://www.yangxingzhen.cn/7987.html
该版本下Skywalking主要分为oap、webapp和agent三部分,oap和webapp分别用于汇总数据和展示,这两块共同组成了Skywalking的平台;agent是探针,部署在需要收集数据的应用服务器上,并将数据同步到Skywalking的平台。
文章源自小柒网-https://www.yangxingzhen.cn/7987.html
环境准备
操作系统:CentOS Linux release 7.9.2009 (Core)
文章源自小柒网-https://www.yangxingzhen.cn/7987.html
服务器IP:192.168.0.4
文章源自小柒网-https://www.yangxingzhen.cn/7987.html
软件版本
elasticsearch:elasticsearch-7.10.2-x86_64.rpm
文章源自小柒网-https://www.yangxingzhen.cn/7987.html
skywalking:apache-skywalking-apm-es7-8.2.0.tar.gz
文章源自小柒网-https://www.yangxingzhen.cn/7987.html
JDK:JDK-1.8.0_181
文章源自小柒网-https://www.yangxingzhen.cn/7987.html
一、基础环境配置
1、关闭防火墙和selinux
文章源自小柒网-https://www.yangxingzhen.cn/7987.html
[root@localhost ~]# systemctl stop firewalld
[root@localhost ~]# systemctl disable firewalld
[root@localhost ~]# setenforce 0
[root@localhost ~]# sed -i '/SELINUX/s/enforcing/disabled/' /etc/selinux/config
2、内核优化
[root@localhost ~]# vim /etc/security/limits.conf
# 在文件最后添加以下内容
* soft nofile 65537
* hard nofile 65537
* soft nproc 65537
* hard nproc 65537
[root@localhost ~]# vim /etc/security/limits.d/20-nproc.conf
# 修改以下内容
* soft nproc 4096
[root@localhost ~]# vim /etc/sysctl.conf
# 添加以下内容
vm.max_map_count = 262144
net.core.somaxconn=65535
net.ipv4.ip_forward = 1
# 执行sysctl -p命令使其生效
[root@localhost ~]# sysctl -p
3、安装JDK环境
[root@localhost ~]# wget https://mirrors.yangxingzhen.com/jdk/jdk-8u181-linux-x64.tar.gz
[root@localhost ~]# tar zxf jdk-8u181-linux-x64.tar.gz -C /usr/local
# 配置/etc/profile,添加以下内容
[root@localhost ~]# vim /etc/profile
export JAVA_HOME=/usr/local/jdk1.8.0_181
export CLASSPATH=$CLASSPATH:$JAVA_HOME/lib:$JAVA_HOME/jre/lib
export PATH=$JAVA_HOME/bin:$JAVA_HOME/jre/bin:$PATH:$HOMR/bin
[root@localhost ~]# source /etc/profile
# 看到如下信息,java环境配置成功
[root@localhost ~]# java -version
java version "1.8.0_181"
Java(TM) SE Runtime Environment (build 1.8.0_181-b13)
Java HotSpot(TM) 64-Bit Server VM (build 25.181-b13, mixed mode)
二、安装Elasticsearch
1、下载Elasticsearch二进制包
[root@localhost ~]# wget https://artifacts.elastic.co/downloads/elasticsearch/elasticsearch-7.10.2-x86_64.rpm
2、安装Elasticsearch
[root@localhost ~]# yum -y install elasticsearch-7.10.2-x86_64.rpm
3、修改elasticsearch.yml配置文件,文件内容如下
[root@localhost ~]# vim /usr/local/elasticsearch/config/elasticsearch.yml
# 集群名称
cluster.name: es-master
# 节点名称
node.name: master
# 存放数据目录,先创建该目录
path.data: /var/lib/elasticsearch
# 存放日志目录,先创建该目录
path.logs: /var/log/elasticsearch
# 节点IP
network.host: 0.0.0.0
# tcp端口
transport.tcp.port: 9300
# http端口
http.port: 9200
4、启动Elasticsearch服务
[root@Ansible ~]# systemctl start elasticsearch
5、查看Elasticsearch启动状态
[root@Ansible ~]# systemctl status elasticsearch
6、查询ES的集群状态
[root@localhost ~]$ curl -X GET 'http://localhost:9200/_cluster/health?pretty'
{
"cluster_name" : "es-master",
"status" : "green",
"timed_out" : false,
"number_of_nodes" : 1,
"number_of_data_nodes" : 1,
"active_primary_shards" : 0,
"active_shards" : 0,
"relocating_shards" : 0,
"initializing_shards" : 0,
"unassigned_shards" : 0,
"delayed_unassigned_shards" : 0,
"number_of_pending_tasks" : 0,
"number_of_in_flight_fetch" : 0,
"task_max_waiting_in_queue_millis" : 0,
"active_shards_percent_as_number" : 100.0
}
#status=green # 表示服务正常
Elasticsearch常用命令
curl -XDELETE 'http://host.IP.address:9200/logstash-*' 删除索引(后面为索引名称)
curl -XGET 'host.IP.address:9200/_cat/health?v&pretty' 查看集群状态
curl -XGET 'host.IP.address:9200/_cat/indices?v&pretty' 查看索引
三、安装Skywalking
1、下载Skywalking软件包
[root@localhost ~]$ wget https://archive.apache.org/dist/skywalking/8.2.0/apache-skywalking-apm-es7-8.2.0.tar.gz
2、解压Skywalking软件包并重命名
[root@localhost ~]$ tar xf apache-skywalking-apm-es7-8.2.0.tar.gz
[root@localhost ~]$ mv apache-skywalking-apm-bin-es7 /usr/local/skywalking
3、启动Skywalking服务
[root@localhost ~]# /usr/local/skywalking/bin/startup.sh
四、访问Skywalking
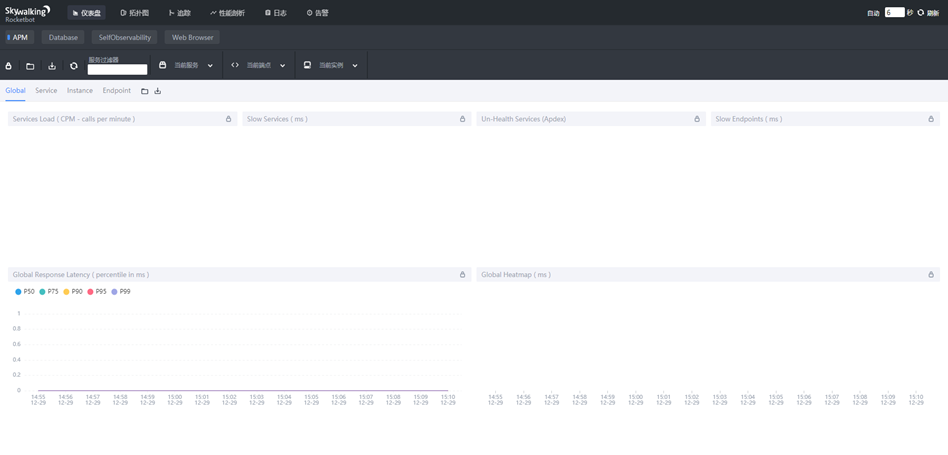
1、浏览器访问:http://192.168.0.4:8080,出现如下界面
五、Skywalking使用
agent的使用
agent的使用需要将/agent整个目录拷贝到对应需要监控的服务器上,并修改/agent/config下的agent.config配置
# 不同的namespace会导致调用链路追踪中断
agent.namespace=${SW_AGENT_NAMESPACE:hmall}
# 页面上展示的service的名称,也可以通过-Dskywalking.agent.service_name=xxx指定
agent.service_name=${SW_AGENT_NAME:gateway}
# 平台的调用地址,也可以通过-Dskywalking.collector.backend_service=127.0.0.1:80指定
collector.backend_service=${SW_AGENT_COLLECTOR_BACKEND_SERVICES:172.28.51.141:11800}
# 忽略指定后缀的请求收集
agent.ignore_suffix=${SW_AGENT_IGNORE_SUFFIX:.jpg,.jpeg,.js,.css,.png,.bmp,.gif,.ico,.mp3,.mp4,.html,.svg}
# 每3秒的采样率,负数代表100%
agent.sample_n_per_3_secs=${SW_AGENT_SAMPLE:-1}
需要重点关注的配置如上所示,修改完成后在启动java进程时增加-javaagent:/opt/apache-skywalking-apm-bin/agent/skywalking-agent.jar以加载agent。
插件使用
默认情况agent是不支持对spring-cloud-gateway的监控的,需要插件的支持。我们要将optional-plugins下的插件apm-spring-cloud-gateway-2.x-plugin-6.5.0.jar拷贝到plugins下,使agent可以加载到该插件,其他一些需要额外插件支持的中间件和框架也是同理操作。
至此,Skywalking分布式追踪系统搭建完成。
若文章图片、下载链接等信息出错,请在评论区留言反馈,博主将第一时间更新!如本文“对您有用”,欢迎随意打赏,谢谢!


登录回复
sysctl –p 中间的 横杠 敲错了 应该是 sysctl -p
登录回复
@ 瓶盖 已修改